Happy Valentine's Day!!! I hope you all have a fun filled day. I made this card by embossing the little hearts using Provo Craft's embossing folder. I then cut out Cupid and matted him onto the sentiment label. The satin ribbon is tied with a double bow and accented with a floral die-namic rose and Melissa Frances pearl.
Showing posts with label MFT Die-Namics. Show all posts
Saturday, February 14, 2015
Saturday, January 17, 2015
I Love You!
Hi There! This is Kim here to share a fun Valentiine's Day card. Nothing says Valentine like Cupid's arrow. This is another quick and easy card to make.I start off by embossing the white cardstock with tiny little hearts. I then die cut Cupid and the frame. Cupid is adhered to the frame using 3-D tape. The ribbon adds a nice shimmery touch and accented with a heart brad. To finish it off I stamped the sentiment onto white cardstock and rounded the corners with a corner rounder.
Supplies can be purchased at A Scrap 'N Place:
Stamps: Fun 'n Flair Stamps (It's All About Love)
Papers: Hampton Art (Jillibean Soup), White Cardstock
Accessories: Organza ribbon with Silver Glitter Trim, Silver Heart Brad
Tools: QuicKutz (Cupid die), MFT (Oval Doily die), Provo Craft (heart embossing folder)
Labels:
brads,
Hampton Art,
Impression Obsession,
Kim,
MFT Die-Namics,
Provo Craft,
Quick Kutz,
ribbon,
Valentine's
Sunday, November 30, 2014
Lawn Fawn Sunday
Hi there and thanks for stopping by!
It's Ceal here, hope everyone had a nice holiday weekend and ate plenty of turkey, Today I am sharing some Lawn Fawn goodies with you. Love this little owl and there is a coordinating die to go along with it. I used some Lawn Fawn paper cut with the Die-namics Blueprint 15 and twine. I added a little Canvas Corp clothes pin to finish it off.
Sunday, October 19, 2014
Monster Mash
Hi there it's Ceal, here to share a site Halloween card made with a cute Lawn Fawn set, Monster Mash. This was a super simple card to make for the background I used the "Goop" die from My Favorite Things. Halloween is not too far away so make sure you stop by to get our supplies to make your cards.
Happy Stamping
Sunday, October 12, 2014
Something's Brewing
Happy Sunday!
It's Ceal here with a fun halloween card made with My Favorite Things Die-namics.
This card was so much fun to make, I started out with a white card base and cut some design paper from best creation. I used the "goop" Die-Namic to cut it at an angle. The fun caldron is also from My Favorite things. I just had to cut out some "goop" in the green glitter paper for my potion. The cute greeting is from Memory box.
Terri is also using these dies in her class tomorrow and there's a few spots left so come join the fun!
Wednesday, July 2, 2014
Let Freedom Ring
Independence Day is right on the doorstep. And our focus this month is on patriotic themes. I'll start off with this card...
I love red, white and blue! And I got a brand new stamp set from Technique Tuesday on Monday that I decided to use for this card.
So, how did I make this one? I started with a navy blue A2 card base. The red star paper was cut 4 x 5-1/4 to leave a border. Then the fun began. I cut two flourishes from the Die-namics Fancy flourish die. After playing around with how to arrange them, I traced off the center line with pencil onto the red star paper, then cut on the line and glued the sheet to the card base. I trimmed the flourishes where they overlapped and attached them along the curved line of the red paper.
Next I cut stars with the Sweet and Sassy star dies and stamped the images from Technique Tuesday's My Hero set on the diecuts. They're attached with dimensionals. The sentiment is also from the My Hero set and is heat embossed.
This card is very mailable! No extra postage charges.
I guess that about covers it... Happy 4th!
Supplies:
Navy and white cardstocks
Patterned paper from Authentique: Pride collection
Stamp set from Technique Tuesday
Star Dies from Sweet and Sassy
Flourish die from MFT Die-namics
Embossing powder from WOW
I love red, white and blue! And I got a brand new stamp set from Technique Tuesday on Monday that I decided to use for this card.
So, how did I make this one? I started with a navy blue A2 card base. The red star paper was cut 4 x 5-1/4 to leave a border. Then the fun began. I cut two flourishes from the Die-namics Fancy flourish die. After playing around with how to arrange them, I traced off the center line with pencil onto the red star paper, then cut on the line and glued the sheet to the card base. I trimmed the flourishes where they overlapped and attached them along the curved line of the red paper.
Next I cut stars with the Sweet and Sassy star dies and stamped the images from Technique Tuesday's My Hero set on the diecuts. They're attached with dimensionals. The sentiment is also from the My Hero set and is heat embossed.
This card is very mailable! No extra postage charges.
I guess that about covers it... Happy 4th!
Supplies:
Navy and white cardstocks
Patterned paper from Authentique: Pride collection
Stamp set from Technique Tuesday
Star Dies from Sweet and Sassy
Flourish die from MFT Die-namics
Embossing powder from WOW
Friday, April 25, 2014
A Butterfly of a Different Color
Here's another one for you to try...
This one is a bit more ornate, but still somewhat easy to execute.
The card base is vanilla and to make the designer paper panel, I used a piece of cardstock with the two papers layered onto it. That gave me a stiffer panel to handle the twill tape that was tied on next.
The diecut butterfly is done in kraft and white papers, and I sponged the white paper with a blue-green ink to match the papers (it does match, regardless of how it looks in the photo!). The butterfly is sprayed with Glimmer mist after gluing it together. Just a bit of shimmer! I cut the swirl die once and cut it into three pieces for what you see here. Pearls were added last.
Supplies
Vanilla cardstock
Designer papers from Authentique (Promise Two) (top) and Glitz (Uncharted Waters) (bottom)
Fancy Flourish Die from Die-namics, butterfly die from Impression Obsession
Twill Tape from May Arts
Pearls from Zva Creative
Friday, April 18, 2014
Springtime is here!
I do like spring! I like being outside. I wish I had a garden. I just don't like bugs. They make a mess of my car when I drive. They want to be in the house...maybe they just want a warm night. And I really don't like caterpillars...but I love butterflies! They're so pretty!
This one is an orangey-red...like oriental poppies. I used the complementary color of a greenish-blue to sponge the front panel. The swirl die is in an avocado green textured cardstock.
Now, I was trying to give the impression of white fuzzy flowers on that flourish. Don't know if I accomplished my goal. ;)
By the way, the card base here is narrow. I think I cut it 4 inches wide instead of 4-1/4 and the greeting is wider, with the ends even with the edge of the card so the middle pops up.
Pearls from Zva Creative
This one is an orangey-red...like oriental poppies. I used the complementary color of a greenish-blue to sponge the front panel. The swirl die is in an avocado green textured cardstock.
Now, I was trying to give the impression of white fuzzy flowers on that flourish. Don't know if I accomplished my goal. ;)
By the way, the card base here is narrow. I think I cut it 4 inches wide instead of 4-1/4 and the greeting is wider, with the ends even with the edge of the card so the middle pops up.
Supplies:
Butterfly Die from Impression Obsession
Flourish Die from Die-Namics
White, Red, Black, Avocado cardstocks
Inks from Stampin' UpPearls from Zva Creative
Friday, April 4, 2014
A Gorgeous Patterned Paper
So, I said that I would show you the "front" of that lovely Glitz patterned paper that I used to make the flourish on the butterfly last week. This card uses it.
The color is actually in a gradient from light to dark on the paper...just gorgeous!
The die is a Die-Namics die from My Favorite Things, called Fancy flourish. The tips of the swirls are accented with pearls from Zva. And the ribbon is a luscious wide silk-look ribbon from May Arts.
Hope you enjoy this simple, but elegant card. Have a great week and I'll have more for you next Friday.
Friday, March 28, 2014
Lovely IO butterfly die!
I'm back again with some new goodies from the store. I love being able to actually go in and pick out what I want. So much better than online...sometimes!
Today I have a card with a yummy two-part butterfly die from Impression Obsession.
I've been searching for a butterfly...any kind works...but this one is just lovely. The two parts to the die are the whole butterfly background, red in this instance, and the detail-cut upper layer, which I did in black. The butterfly is popped up on dimensionals.
There's a second die on this card, too. It's the Die-namics Fancy Flourish. It's cut out of the back side of a Glitz Design patterned paper. I'll show you the front side next week. The chevron paper is Echo Park Hippity Hoppity. There's cute bunny silhouettes on the reverse.
Supplies:
Cardstock in White, Red, Black
Designer papers from Echo Park and Glitz Design
Dies from Impression Obsession and Die-namics
Pearls are Zva Creative
Greeting from Stampin' Up
Tuesday, March 18, 2014
Happy Anniversary Card
Hi Everyone
Michelle here from Lady of Leisure Ink, and today I have a cute anniversary card to share with you.
I love this brown and kraft card stock from Canvas Corp, and it goes really well with this shiny copper coloured card stock. Here is a closer look at the detail.
Inside I put another strip of the printed card stock inside and a computer generated sentiment.
Chocolate and Kraft Swirls card stock (Canvas Corp)
Copper card stock
Dainty Tea Cup die (Memory Box)
Swirl die (Die-namics)
Precious Hearts die (Memory Box)
Sheer ribbon
Computer generated sentiment
Thanks for stopping by today - see you next time.
Michelle
Tuesday, March 11, 2014
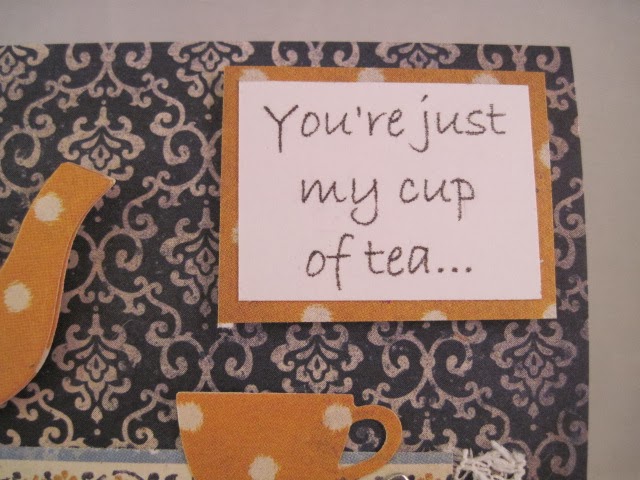
You're Just My Cup of Tea
Hi Everyone
Michelle here from Lady of Leisure Ink. Today I am using the wonderful 'Always Time for Tea' die by Die-namics.
This was such a fun die to play with, and I love all the little parts to it (how adorable are those little spoons?)
Wouldn't this make a lovely card for a friend, just because?
Supplies used:
Vintage Blue (6" Glitz Paper Pack)
Always Time For Tea die (Die-namics)
Lace
Computer generated sentiment
Thanks for stopping by, see you next time.
Michelle
Michelle here from Lady of Leisure Ink. Today I am using the wonderful 'Always Time for Tea' die by Die-namics.
This was such a fun die to play with, and I love all the little parts to it (how adorable are those little spoons?)
Wouldn't this make a lovely card for a friend, just because?
Supplies used:
Vintage Blue (6" Glitz Paper Pack)
Always Time For Tea die (Die-namics)
Lace
Computer generated sentiment
Thanks for stopping by, see you next time.
Michelle
Tuesday, March 4, 2014
I Like You A Latte
Hi Everyone
Michelle here from Lady of Leisure Ink - thanks for having me Terri. Today's card is just a simple birthday card for a friend, particularly a 'coffee-lover'.
Here is a closer look at the details.
On the inside, a computer generated sentiment.
Here is a list of the supplies used.
Chocolate and Kraft Swirl card stock (Canvas Corp)
Pink Dot card stock (Authentique)
Dainty Tea Cup die (Memory Box)
Swirl die (Die-namics)
Ribbon
Tulip puffy paint
Thanks for stopping by today - see you next time.
Michelle
Saturday, February 1, 2014
Valentine XOXO
Hi There! This is Kim sharing with you a Valentine card. I love the look of kraft and red together. I created the X and O background by using Memory Box's Hugs and Kisses die. I then layered it onto of the red bazzill cardstock. I cut out the oval using MFT's Die-namics die. The oval doily and heart was adhered using 3-D foam. The sentiment is then stamped and the tag was cut freehand. Last is the pearls from Melissa Frances.
Supplies can be purchased at A Scrap N Place:
Stamps: Sweet 'n Sassy Stamps (Bottom of My Heart)
Inks: Red Chalk
Papers: Canvas Corp, Kraft Cardstock
Accessories: ribbons, twine, Melissa Frances pearls
Labels:
Kim,
memory box,
MFT Die-Namics,
Sweet 'n Sassy Stamps,
want2scrap
Wednesday, January 29, 2014
Heart Plant
This card challenged me because I wanted to use the hearts and flowers.
Supplies
My Besties Die cut hearts
Dienamics Rustic hearts
memory Box Quinn Flourish
Orchid Branch Memory Box
Couture creations Celebrate
Black Paper
Pink Paper
Designer Paper
White and Black Brads
Black and white ribbon
Bling.
I started the card by embossing the background with the Celebrate embossing folder,
Then I cut out the dies on red paper and embossed using a Sizzix embossing folder.
I attached the hearts with brads so you can move them around..
and added some designer paper as a belly band on the bottom..
thanks for stopping by
Debbie
Labels:
Couture Creations,
Debbie,
memory box,
MFT Die-Namics
Wednesday, January 22, 2014
Love Grows Here
Todays card was made with using some fun dies and Stamps… love the dies that are made to match stamps so When I saw they had a set up stamps to match the dies.. long story short I had to order them.
Supplies
My Favorite Things Stamps Home Spun Hearts
Die-namics Rustic hearts
Spellbinders Radiant Rectangles
Memory Box Precious Hearts
Red Ribbon
Black Ribbon
Distress Inks
Barn Door
Festive Berries
Evergreen Bough
Victorian Velvet
White paper
Red paper
Black paper
Designer
Black Memento
gems
I started by stamping the hearts on white paper with Distress Inks. and using the dies to cut out the hearts. .. the stems I cut out with the scissors.. then I mounted on red paper cut out with a spellbinders dies and added gems and designer paper
Thanks for stopping by
Debbie
Labels:
Debbie,
MFT Die-Namics,
my favorite thing stamps,
Spellbinders
Wednesday, January 15, 2014
Valentines gift card holder
today for A Scrap N Place in Co.. I made a gift card … The gift card holder was inspired by one on Splitcoast … This is a pop up gift card folder..
Supplies
memory box Macarena Corner
Die-namic rustic hearts
circle spellbinders dies
Red ribbon
Red Thread
gems Alpha Stamp
Distress Ink Victorian Velvet
Pink paper
designer paper
score pal
red miracle tape
to do this gift card holder the best thing is to go to split coast stampers.. because they have a tutorial that is so easy to follow… and the I just love how you can use the die-namics dies in so many fun ways.
Thanks for stopping by
Debbie
Supplies
memory box Macarena Corner
Die-namic rustic hearts
circle spellbinders dies
Red ribbon
Red Thread
gems Alpha Stamp
Distress Ink Victorian Velvet
Pink paper
designer paper
score pal
red miracle tape
to do this gift card holder the best thing is to go to split coast stampers.. because they have a tutorial that is so easy to follow… and the I just love how you can use the die-namics dies in so many fun ways.
Thanks for stopping by
Debbie
Wednesday, January 8, 2014
Love Note
I hope everyone .. had a wonderful Christmas and New Years… But are you ready for Valentine's Day.. if not or even if you think you are .. you need to visit a Scrap N Place to get some really awesome dies and paper to use on the card or other gift you are making for that special someone.
Supplies
Dies
Memory Box Gwyneth Flourish
Memory Box Fabulous Phlox
Quick Kuitz heart doily
Dienamics Rustic hearts
My Besties Die Cuts .. Love
Cheery Lynn Designs Mini Flourish
Other
Mini Bags Canvas Home
alphabet stamp…U
Memento Black Ink
Victorian Velvet Distress Ink
Black Ribbon
Couture Creation Embossing folder Celebrate
Black paper
Red Paper
Designer Paper
White Paper
Circle Clip
black Gem Eva Creations
White memories die ink
The card is a six by Six square…
I layered the designer paper with black.. on a white background.. the added my dies.. the envelope I colored with distress ink using a sponge.. and using one of the hearts from dienamics as a design to go around.. the hearts on the envelope where put thru the embossing folder.. inside the envelope is just a little note made with some dies and a stamp..
Thanks for stopping by
Debbie
Labels:
Cheery Lynn,
Debbie,
memory box,
MFT Die-Namics,
Quic Kutz,
Valentine's
Saturday, November 30, 2013
Joy
Hi There! This is Kim with a quick and easy Christmas card to share with you today. I used Authentique's Joyous papers, then die cut the oval and stamped the word Joy in the center. The bows are tied together and knotted in the center with a shimmery red ribbon.
Supplies (all can be purchased at A Scrap 'N Place):
Papers: Authentique's Joyous, Vanilla cardstock
Accessories: assorted red and green ribbons
Tools: MFT Die-Namices doily dies
Labels:
Authentique,
Authentique Joyous,
Christmas,
Kim,
MFT Die-Namics
Subscribe to:
Posts (Atom)