Showing posts with label Dies. Show all posts

Saturday, January 24, 2015

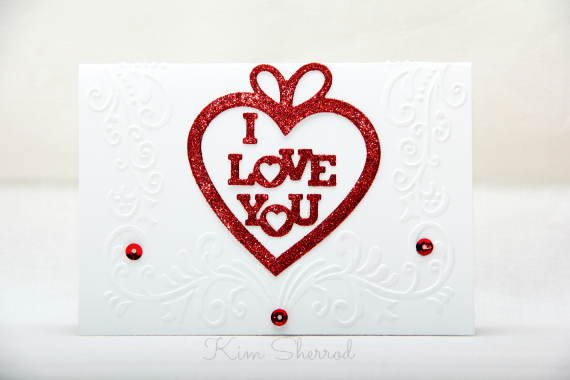
I Love You

Hi There! This is Kim here to share with you this CAS card uses simple dies and embossing to create an elegant and quick card.  First off I used Ectasy Crafts framed embossing folder then I used Impression Obsessions dies to cut out the heart and sentiment. I love the red glitter paper that's used for the dies. It adds a beautiful shimmer to the card. Last are some little red sequins to embellish the embossed areas.


All supplies can be found at A Scrap 'N Place:

Papers: White cardstock, Red Glitter cardstock
Accessories: Red Sequins
Tools: IO Dies (Heart #DIE31-K), Ecstasy Crafts Inc. (Embossing Folder #EFC1001)

Wednesday, July 2, 2014

Let Freedom Ring

Independence Day is right on the doorstep.  And our focus this month is on patriotic themes.  I'll start off with this card...


I love red, white and blue!  And I got a brand new stamp set from Technique Tuesday on Monday that I decided to use for this card.

So, how did I make this one?  I started with a navy blue A2 card base.  The red star paper was cut 4 x 5-1/4 to leave a border.  Then the fun began.  I cut two flourishes from the Die-namics Fancy flourish die.  After playing around with how to arrange them, I traced off the center line with pencil onto the red star paper, then cut on the line and glued the sheet to the card base.  I trimmed the flourishes where they overlapped and attached them along the curved line of the red paper.

Next I cut stars with the Sweet and Sassy star dies and stamped the images from Technique Tuesday's My Hero set on the diecuts.  They're attached with dimensionals.  The sentiment is also from the My Hero set and is heat embossed.

This card is very mailable! No extra postage charges.

I guess that about covers it...  Happy 4th!

Supplies:
Navy and white cardstocks
Patterned paper from Authentique: Pride collection
Stamp set from Technique Tuesday
Star Dies from Sweet and Sassy
Flourish die from MFT Die-namics
Embossing powder from WOW
Saturday, June 21, 2014

Christmas Snowflakes

Hi There! Kim here with another fun Christmas card using Sweet 'n Sassy Stamps' Snowflake die set. I rounded the bottom corners of the papers using a corner rounder. I then die cut the snowflakes using the white glitter paper and red cardstock. These two snowflakes are then stacked on top of each other using 3-D foam tape and the red star in the center. Last is to add the silver spiral clip and green organza ribbon.


All supplies can be purchased at A Scrap 'N Place.
Papers: Bazzill (red textured cardstock), Basic Grey (Figgy Pudding), White Glitter cardstock, red cardstock
Accessories: Silver Spiral Clip, Green Organza Ribbon
Tools: Sweet 'n Sassy Stamps (Snowflake die set)

Saturday, June 14, 2014

Merry Christmas

Hi There! Kim here with a quick and fun Christmas card using the snowflake dies from Sweet 'n Sassy Stamps as a focal point. I distressed the kraft cardstock with white ink. The snowflake dies are layered using 3-D foam tape and a brad is then added to the center. The banner is done freehand then distressed also.


All supplies can be purchased at A Scrap 'N Place.

Papers: Bo Bunny (Woodland Winter), Kraft cardstock, White cardstock
Accessories: Silver Brad, Snowman charm
Inks: white, black
Tools: Sweet 'n Sassy Stamps (snowflake die set)

Saturday, May 31, 2014

Winter Kisses

Hi There! Kim here with a Christmas card to kick off Christmas in June. What a way fun to get a head start on your Christmas cards. I created a quick card using Sweet 'n Sassy Stamps' snowflake die for the main focus. I popped the snowflake up using 3-d foam tape. The snowman paper and blue cardstock was distressed with distressing ink. The twine is then added to finish the card.


All supplies can be purchased at A Scrap 'N Place:

Inks: Tim Holtz Distressing Ink, Black ink
Papers: Glitter White Cardstock, Brown Cardstock, Bazzill green textured Cardstock, Blue Cardstock
Accessories: The Twinery Green and white twine
Tools: Sweet 'n Sassy Stamps Snowflake die set

Friday, April 18, 2014

Springtime is here!

I do like spring!  I like being outside.  I wish I had a garden.  I just don't like bugs.  They make a mess of my car when I drive.  They want to be in the house...maybe they just want a warm night.  And I really don't like caterpillars...but I love butterflies!  They're so pretty!

This one is an orangey-red...like oriental poppies.  I used the complementary color of a greenish-blue to sponge the front panel.  The swirl die is in an avocado green textured cardstock.

Now, I was trying to give the impression of white fuzzy flowers on that flourish.  Don't know if I accomplished my goal. ;)

By the way, the card base here is narrow.  I think I cut it 4 inches wide instead of 4-1/4 and the greeting is wider, with the ends even with the edge of the card so the middle pops up. 

 
Supplies:
 
Butterfly Die from Impression Obsession
Flourish Die from Die-Namics
White, Red, Black, Avocado cardstocks

Inks from Stampin' Up
Pearls from Zva Creative

Friday, April 11, 2014

Butterfly season


I used the same lovely butterfly from Impression Obsession again on this week's card. 


I am loving working with that die.  It cuts beautifully, the two layers line up perfectly (well, as good as my old eyes work anyway!).    The circle is cut with a Spellbinders circle...use your choice of size.

Supplies:
White and black cardstock
The golden brown is the reverse side of the Glitz designer paper I've been using for the last couple of cards, the Chevron is Hippity Hoppity paper from Echo Park...and is mounted directly to the card front.
The bow is tied around the top cardstock layer only...from the circle to the edge.  It is crinkly paper ribbon from May Arts that looks like rope until you fan it out...CAREFULLY!  Ask me how I know!
Pearls are Zva Creative

Friday, March 28, 2014

Lovely IO butterfly die!

I'm back again with some new goodies from the store.  I love being able to actually go in and pick out what I want.  So much better than online...sometimes!

Today I have a card with a yummy two-part butterfly die from Impression Obsession.
 
 
I've been searching for a butterfly...any kind works...but this one is just lovely.  The two parts to the die are the whole butterfly background, red in this instance, and the detail-cut upper layer, which I did in black.  The butterfly is popped up on dimensionals.
 
There's a second die on this card, too.  It's the Die-namics Fancy Flourish.  It's cut out of the back side of a Glitz Design patterned paper.  I'll show you the front side next week.  The chevron paper is Echo Park Hippity Hoppity.  There's cute bunny silhouettes on the reverse.
 
Supplies:
Cardstock in White, Red, Black
Designer papers from Echo Park and Glitz Design
Dies from Impression Obsession and Die-namics
Pearls are Zva Creative
Greeting from Stampin' Up


Monday, October 14, 2013

Red and Vanilla Christmas

One of my favorite color combinations for Christmas is red and vanilla.  White is pretty with red, but vanilla is so rich!  I love this music designed paper...it's from Making Memories.

 
For this card I used just the bottom portion of the die, leaving off the top of the tree.  The music paper and the red layer are distressed, and I added a spray of branches to the bow.  Red rhinestones finish off the card...some on the spray and some on the music.  Hope you enjoy!
 
Supplies
Cardstock: Red, vanilla, artichoke green
Designer paper: Making Memories Twinkle
Die: Impression Obsession Merry Tree
Ribbon: May Arts, a bit of natural twine
The rest: Rhinestones, dimensionals, punch for the branches.
 
All supplies from A Scrap N Place

Saturday, October 12, 2013

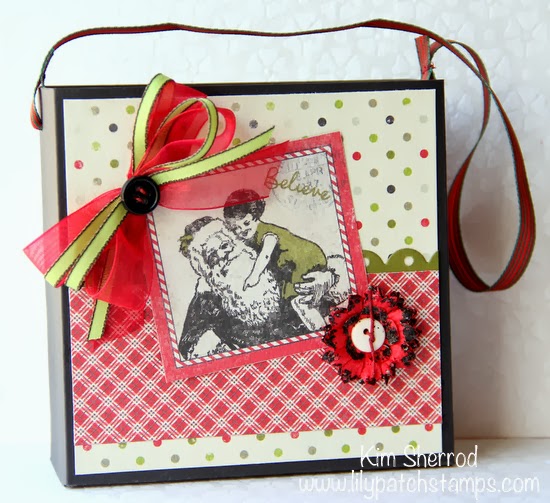
Christmas Gift Bag

Hi There! This is Kim sharing with you a fun gift bag using the papers from Authentique's Joyous Collection. I die cut the scallops and punched holes to give it a more delicate look. I also added some black glitter to the edges of the flowers and a button in the center. I used thread to sew the ends of the ribbon to secure the handle. 


 I also decorated the back of the box. 

All Supplies can be purchased at  A Scrap 'N Place
Papers: Authentique Joyous Collection, Black Cardstock
Accessories: Kaiser Scrapbook (flowers), Ranger (black soot distressed glitter), Assorted ribbons, buttons
Tools: Sweet 'n Sassy Stamps (scallop dies), 1/8" hole punch

Saturday, October 5, 2013

A Joyous Christmas

Hi There! It's time to think about getting ready for your Christmas projects. I made this card using Penny Blacks new Holly Berries die. I  used Copic markers to color in the hollies and berries after I die cut it. I added an extra sprig and used wet glue to keep it together. I embossed the solid cardstock to give it some texture and the hollies and berries were adhered to the card using 3-D foam tape. 


All supplies can be purchased at A Scrap 'N Place:
Papers: Authentique Paper Collection
Accessories: Freckled Fawn (rhinestone), Organza ribbon
Tools: Provo Craft (Swiss Dots embossing folder), Penny Black (Holly Berries die)


Saturday, September 28, 2013

Treat Bag

What is Halloween without some yummy treats? I made this treat bag to hold some of your yummy treats or better yet a gift bag for teachers and friends.
I used the plaid paper from Authentique's Thriller line and the sentiment is from the sticker sheet. I added a scallop border then accented the border with rhinestones. I pulled everything together with some pretty ribbons and a tag.


Supplies ( All Supplies can be found at A Scrapin' Place):
Papers: Authentique (Thriller Collection plus Detail Sticker Sheet), Cream Cardstock
Accessories: Bazzill Basics Papers (clear rhinestones), Sweet 'n Sassy Stamps (scallop dies), Black Fiber, Orange Ribbon, Melissa Frances pearls